Under-Cabinet Radio SKRD 30 A1
|
|
|
- Aune Leppänen
- 7 vuotta sitten
- Katselukertoja:
Transkriptio

1 Under-Cabinet Radio KOMPERNASS GMBH BURGSTRASSE 21 D BOCHUM ID-Nr.: -07/11-V3 IAN: Under-Cabinet Radio Operating instructions Radio Bruksanvisning Unterbau-Radio Bedienungsanleitung Hyllyn alle asennettava radio Käyttöohje Radio med mulighed for fastmontering Betjeningsvejledning


2 A 1 z t q w e r u i o p p B
3 Index Introduction Information for these operating instructions Copyright Proper usage Warning notices Safety Danger from electric shock Handling of batteries Basic Safety Instructions Operating components Setting up and connecting... 7 Safety instructions Package contents and transport inspection Unpacking Disposal of the packaging Set-up location requirements Electrical connection Inserting the battery Mounting under a wall cupboard.. 9 Disassembly Setting up the device Providing mains power VHF wire antenna Handling and operation...11 Switching On and Off Basic settings Activating the settings menu Setting the time Setting the date Setting the memory function Setting the time of day format Setting automatic display dimming. 13 Setting the display dimming s switch on and off time Kitchen timer Setting the kitchen timer Starting the kitchen timer Pausing the kitchen timer Programming the kitchen timer Accessing the kitchen timer Programming alarm wake times...17 Wake with alarm tone Waken with radio Switching the alarm off When the wake time has arrived..18 The Reminder function Radio operation Switching the radio on/off Adjusting the volume Manual station selection Search for the next station Saving stations manually Access saved stations Automatic station search (AMS function) Additional functions Automatic switch off (Sleep function).21 Button lock Bass accentuation Setting the display brightness manually Setting alternative display Cleaning Safety instructions Cleaning the housing Troubleshooting Safety instructions Malfunction causes and remedies.23 Storage/Disposal Storage Disposal of the device Disposing of the batteries Appendix Information regarding the EG conformity declaration Technical data Warranty Service Importer GB IE 1
4 Introduction GB IE Introduction Information for these operating instructions These operating instructions are a component of the Under-Cabinet Radio (henceforth designated as the device) and they provide you with important information about the intended use, safety, installation and connection as well as operation of the device. The operating instructions must be kept available in the vicinity of the device at all times. They are to be read and used by anyone assigned to service and repair faults in the device. Retain these operating instructions and pass them on with the device to any future owners. Copyright Proper usage This documentation is copyright protected. Any copying or reproduction, including as extracts, as well as the reproduction of images, also in an altered state, is not permitted without the express written consent of the manufacturer. This device is only intended for the reception of VHF radio programmes, as a kitchen timer and as an alarm by means of an alarm tone or radio in enclosed spaces. The device is intended as a free standing unit or for mounting under a cupboard. For these purposes the supplied stand and/or mounting plate must be used. Any other use or uses beyond those mentioned are considered unintended use. The device is not intended for use in commercial or industrial environments. WARNING Danger from unintended use! Danger from the device can result if it is used for unintended purposes and/or other types of use. Use the device exclusively for intended purposes. Observe the procedures described in these operating instructions. No warranty claims of any kind will be accepted for damage caused by improper use, unauthorised repairs, unauthorised modifi cations or for the use of unapproved replacement parts. The operator alone bears liability. 2
5 Introduction Warning notices In the current operating instructions the following warning notices are used: GB IE DANGER A warning in this danger level indicates a hazard threatening situation. In the event that the hazardous situation is not avoided it can lead to death or serious injury. The directives in this warning are there in order to avoid the danger of death or serious injury. WARNING A warning of this danger level signifies a possible dangerous situation. If the dangerous situation is not avoided it can lead to injuries. The directives in this warning are there to avoid personal injuries. IMPORTANT A warning of this danger level signifies possible property damage. If the situation is not avoided it can lead to property damage. The directives in this warning are there to avoid property damage. NOTICE A notice signifi es additional information that assists in the handling of the device. 3
6 Introduction GB IE Safety In this section you receive important safety information regarding handling of the device. This device complies with the statutory safety regulations. Incorrect usage can lead to injuries and property damage. Danger from electric shock DANGER Risk of fatal electrocution! A life-threatening situation can arise from contact with live wires or components! Observe the following safety instructions to avoid electric shock hazards: Do not use the device if the mains power plug or the connection cable are damaged. Do not, under any circumstances, open the device housing. The risk of an electric shock is present if the power carrying connections are touched or the electrical or mechanical construction is changed. Handling of batteries WARNING Danger from improper use! For safe handling of batteries observe the following safety instructions: Do not throw batteries into a fi re. There is the risk of an explosion! Do not short circuit batteries. Do not attempt to recharge batteries. Regularly check the condition of the batteries. Leaking battery acid can cause permanent damage to the device. Special caution should be shown when handling damaged or leaking batteries. Danger from acid burns! Wear protective gloves. Store batteries in a place inaccessible to children. If swallowed seek immediate medical attention. If you do not intend to use the device for an extended period of time, remove the batteries. 4
7 Introduction Basic Safety Instructions For safe handling of the device observe the following safety instructions: Before use check the device for visible external damage. Do not put into operation a device that is damaged or has been dropped. Damaged cables or connections should be replaced by authorised qualifi ed persons or by the customer service department. This device is not intended for use by individuals (including children) with restricted physical, physiological or intellectual abilities or defi ciences in experience and/or knowledge unless they are supervised by a person responsible for their safety or receive from this person instruction on how the device is to be used. Children must be supervised in order to make sure that they do not play with the device. Repairs should only be carried out by authorized specialist companies or by the customer service department. Incorrect repairs can result in danger to the user. In addition warranty claims become void. A repair to the device during the warranty period may only be carried out by a customer service department authorized by the manufacturer otherwise no additional warranty claims can be considered for subsequent damages. Defective components may only be replaced with original replacement parts. Only by using original replacement parts can you guarantee that the safety requirements are complied with. Protect the device from moisture and liquid penetration. Never submerge the device in water, do not place the device in the vicinity of water and do not stand any object fi lled with liquid (i.e. vases) on the device. Do not place any objects on the device. Do not operate the device in the vicinity of open fl ames (i.e. candles). Avoid direct sunlight. Always pull on the power plug when disconnecting from the wall socket, never pull on the connection cable. If malfunctions occur or thunder storms threaten pull the power plug from the wall socket. GB IE 5
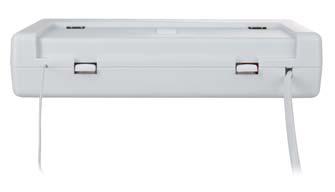
8 Operating components GB IE Operating components (for illustrations see fold out sides figure A) Mounting plate/stand 2 Control panel 3 Display 4 On/Off : On/Off switch (Radio) 5 Dimmer/AOT: Display brightness setting/switch off timer 6 Lock/Mem.: Button lock/memory slot selection 7 Bass/AMS/Mode: Bass accentuation/station search/access setting menu 8 Alarm 1: Alarm 1 programming/alternative display settings 9 Alarm 2: Alarm 2 programming/alternative display settings 10 Preset : selection of the previous memory slot 11 Preset+: selection of the next memory slot 12 Tune : Decrease the reception frequency 13 Tune+: Increase the reception frequency 14 VOLUME/Snooze/Timer: Volume control/alarm switch off /Timer setting 15 Wire antenna for VHF reception 16 Mains connection cable 17 Recesses for stand 18 Speakers 19 Battery compartment 20 Unlocking buttons for the mounting plate 6
9 Setting up and connecting Setting up and connecting Safety instructions GB IE WARNING Damage may occur to property and injuries to people when operating the device! Observe the following safety instructions to avoid dangers: Packaging material should not be used as a play thing. There is a risk of suff ocation! To avoid risks to persons and property, observe the requirements for the set-up location and the electrical connections. Package contents and transport inspection Unpacking The device is delivered with the following components as standard: Under-Cabinet Radio Mounting plate/stand 4 Securing screws 1 x Battery 3 V Type CR2032 Operating instructions NOTICE Check the contents to make sure everything is there and for visible damage. If the items supplied are incomplete, or damaged due to defective packaging or transportation, contact the Service Hotline (see section Service). Remove all device parts and the operating instructions from the carton. Remove all packing material. 7
10 Setting up and connecting GB IE Disposal of the packaging The packaging protects the device from transport damage. The packaging materials are selected from the point of view of their environmental friendliness and disposal technology and are therefore recyclable. The recirculation of packaging into the material circuit saves on raw material and reduces generated waste. Dispose of packaging material that is no longer needed according to the regionally established regulations. NOTICE If possible preserve the device's original packaging during the warranty period so that in the case of a warranty claim you can package the device properly for return. Set-up location requirements For the safe and fault free operation of the device, the set-up location must fulfi ll the following conditions: When setting up the device place it on a fi rm, fl at and even surface. Use the supplied stand. Set up or mount the device in such a way that the available ventilation openings and the speaker are not covered. Do not operate the device in a hot, wet or very humid location or in the vicinity of fl ammable materials. The surfaces of furniture may contain components that could aff ect and soften the rubber feet on the device. If necessary, place an anti-slip mat under the rubber feet of the device. The wall socket must be easily accessible so that, in an emergency, the plug can be quickly withdrawn from the socket. Electrical connection Before connecting the device, compare the connection data (voltage and frequency) on the rating plate of the device with that of your power supply network. This data must be compatible to avoid possible damage to the device. Make sure that the device's connection cable is not damaged and is not laying over hot surfaces and/or sharp edges. Make sure that the connection cable is not tightly stretched or bent. Do not allow the connection cord to hang over edges (Trip wire eff ect). 8
11 Setting up and connecting Inserting the battery By inserting the battery you can avoid the loss of programmed time of day and alarm times in the event of a possible power outage. The battery ensures that the internal clock continues to run even during a power failure. When power is restored the correct time appears automatically in the display 3. GB IE NOTICE The device can also be operated without a battery. Open the cover of the battery compartment 19 on the underside of the device by turning the cover to the left, with a coin, as far as it will go and then lift off. Insert the battery type CR2032 (supplied) into the battery compartment. The side with the marking + points upwards. Close the battery compartment by attaching the cover and then with a coin turn it to the right. Mounting under a wall cupboard (Illustration see fold out side figure B) With the supplied mounting plate you can mount the device under, for example, a wall cupboard. For mounting of the device proceed as follows: Press both unlocking buttons 20 on the rear panel of the device downwards thereby, at the same time, sliding the mounting plate backwards and remove the mounting plate. Find a suitable set-up location for the device (see also the section Requirements for the set-up location). Hold the mounting plate under the set-up location. Thereby the front edge of the mounting plate should be approx. 3,5 cm behind the front of the cupboard so that, after Remove the mounting, the device is fl ush with the cupboard. Mark the 4 fastening points with a pencil. Using a spike or nail, make a small depression at the respective marking points. Screw the mounting plate tightly with the supplied screws as illustrated in fi gure B. Place the device aslant, with the front recesses in the top face, in the mounting plate. Press the rear part of the device upwards against the mounting plate until the device audibly locks into place. Check to make sure that the device is secure. 9
12 Setting up and connecting GB IE Disassembly Press both unlocking buttons 20 on the rear panel of the device downwards, thereby sliding, at the same time, the device forward and then remove the device downwards. Unscrew the screws on the mounting plate and remove the mounting plate. Setting up the device As an alternative you can stand the device on a top. So as not to cover up the ventilation slots and the speaker 18 on the underside of the device, when setting up the device it must be mounted on the stand. For assembly of the stand proceed as follows: Press both unlocking buttons 20 on the rear panel of the device downwards thereby, at the same time, sliding the mounting plate backwards and remove the mounting plate. The mounting plate can now be used as a stand. Slide both front retaining tabs of the stand into the rear recesses 17 on the underside of the device. Press both rear retaining tabs of the stand into the front recesses 17 on the underside of the device until the stand audibly locks into place. Find a suitable set-up location for the device (see also the section Requirements for the set-up location). Providing mains power Insert the mains connection cable 16 power plug into a socket. The time of day will be shown in the display 3 ( o'clock). VHF wire antenna Unwind the wire antenna 15 completely for VHF reception. 10
13 Handling and operation Handling and operation In this section you receive important information for the handling and operation of the device. GB IE Switching On and Off After the device has been connected to the power supply it is already switched on. Via the On/Off 4 button you switch between the operational modes clock/ standby operation and radio. NOTICE The On/Off switch 4 does not disconnect the device completely from the mains power. The device also consumes power when in Standby-Mode. To completely disconnect the device from the mains power the mains power cable plug 16 must be pulled from the mains socket. Basic settings After the device has been connected to the mains power supply it shows the time of day and the day of the week in the display 3. The device is in the operational mode clock/standby operation. Activating the settings menu To activate the settings menu, whilst in the operational mode clock/standby operation, press the Bass/AMS/Mode 7 button. The time of day, shown in the display 3, begins to blink. Each further actuation of the Bass/AMS/Mode 7 button switches to the next setting potential. The menu item sequence is: Setting the time of day Setting the date Setting the memory function Setting the time of day format Setting automatic display dimming. Setting the display dimming s switch on and off time. NOTICE The setting menu ends automatically if you do not actuate any buttons for approx. 15 seconds. The executed setting is saved. 11
14 Handling and operation GB IE Setting the time Prerequisite: The device is in the operational mode clock/standby operation. Press the Bass/AMS/Mode 7 button once. The time of day indicator begins to blink. Set with the buttons Tune+ 13 and Tune 12 the current time of day. With each button press the time of day changes by one minute. Holding down the respective button for more than 2 seconds starts the speed setting. Press the Bass/AMS/Mode 7 button again to save the current setting and move to the next menu item. NOTICE The time of day will revert back to o'clock if the device is disconnected from the mains power supply and no battery is inserted or if the battery is too weak. Setting the date Prerequisite: The device is in the operational mode clock/standby operation. Press the Bass/AMS/Mode 7 button twice. The date indicator begins to blink. Set with the buttons Tune+ 13 and Tune 12 the current date. With each button press the date is changed by one day. The weekday indicator changes automatically. Holding down the respective button for more than 2 seconds starts the speed setting. Press the Bass/AMS/Mode 7 button again to save the current setting and move to the next menu item. NOTICE The date will revert back to, if the device is disconnected from the mains power supply and no battery is inserted or if the battery is too weak. Setting the memory function You can set up to 10 date reminders to which an automatic reminder will be triggered. The function SdA (SdA=Special Day Alert) is useful as a reminder, for example, of birthdays or other recurring events. The reminder occurs every year on the same date. Prerequisite: The device is in the operational mode clock/standby operation. Press the Bass/AMS/Mode 7 button three times. The current setting of the selected reminder date is shown alternating with the indicator. Next to the indicator is the number of the memory slot for that date. Possible reminders are to. 12
15 Handling and operation Select with the buttons Preset+ 11 and Preset 10 the memory slot for the date to be set. Set with the buttons Tune+ 13 and Tune 12 the date for this memory slot. With each button press the date is changed by one day. Holding down the respective button for more than 2 seconds starts the speed setting. NOTICE Press the Dimmer/AOT 5 button if you want to switch off the date for the currently set date. The reminder now occurs every year on the same date.. To deactivate the memory function, programme in a date that lies in the past. Press the button Lock/Mem. 6 to set the time of day at which the reminder function is to be triggered. The setting is carried out with the buttons Tune+ 13 and Tune 12 on the hour between 00 and 23. This setting applies to all programmed reminder dates Press the Bass/AMS/Mode 7 button again to save the current setting and move to the next menu item. GB IE Setting the time of day format Prerequisite: The device is in the operational mode clock/standby operation. Press the Bass/AMS/Mode 7 button four times. The current setting for the time of day format is shown ( =24 hour format or =12 hour format). With the button Tune+ 13 set the time of day format to if you want a time of day display in the 24 hour format. With the button Tune 12 set the time of day format to if you want a time of day display in the 12 hour format. Press the Bass/AMS/Mode 7 button again to save the current setting and move to the next menu item. Setting automatic display dimming. Prerequisite: The device is in the operational mode clock/standby operation. Press the Bass/AMS/Mode 7 button fi ve times. The current setting for the automatic display dimming is shown ( = function switched on or = function switched off ). With the button Tune+ 13 set the function if the display illumination should be switched on and off at a setable time. With the button Tune 12 set the function if the display illumination is to be switched on permanently. Press the Bass/AMS/Mode 7 button again to save the current setting and move to the next menu item. 13
16 Handling and operation GB IE Setting the display dimming s switch on and off time Kitchen timer Prerequisite: The device is in the operational mode clock/standby operation. Press the Bass/AMS/Mode 7 button six times. The current setting for the display dimming switch on time is shown ( = display illumination dims at 11 o clock pm (23:00)). Set with the buttons Tune+ 13 and Tune 12 the desired time of day. With each button press the time of day changes by one minute. Holding down the respective button for more than 2 seconds starts the speed setting. Press the Bass/AMS/Mode 7 button again to save the current setting and move to the switch off time setting. The current setting for the display dimming switch off time is shown ( = display illumination switches on again at 6 o clock am (6:00)). Set with the buttons Tune+ 13 and Tune 12 the desired time of day. With each button press the time of day changes by one minute. Holding down the respective button for more than 2 seconds starts the speed setting. Press the Bass/AMS/Mode 7 button again to save the current setting and exit the setting menu. The current time of day is shown. The device has a convenient kitchen timer with which, for example, cooking and baking times can be monitored. The programmable time range of the kitchen timer lies between 1 minute and 23 hours, 59 minutes. Setting the kitchen timer Press the Snooze/Timer 14 button. The display shows. In the right upper corner of the display 3 the saucepan symbol for the kitchen timer is superimposed. Turn the VOLUME 14 knob to set the time range for the kitchen timer. Turning in a clockwise direction increases the time; turning in a counter clockwise direction reduces the time. NOTICE If, during the setting, approx. 15 seconds passes without any changes taking place the device reverts back to the previous operational mode. 14
17 Handling and operation Starting the kitchen timer After setting the time press the button Snooze/Timer 14 again. The displayed time begins to run backwards. In the right, upper corner of the display 3 a backwards running clock is superimposed. GB IE NOTICE If, during the operation of the kitchen timer, another function is selected the display of the remaining time fades out. The saucepan symbol and the backward running clock in the right, upper corner of the display 3, however, continue to be shown. Press the button Snooze/Timer 14 again to allow the remaining time of the kitchen timer to be shown once more. 30 seconds before the kitchen timer run time has expired the device begins to acoustically indicate, with individual signal tones, the arrival of the set time. Thereby the interval between the individual tones becomes shorter and shorter. When the set time has arrived the kitchen timer's alarm signal sounds as a continuous tone. Press the button Snooze/Timer 14 to switch off the kitchen timer alarm signal. Pausing the kitchen timer. Press, while the kitchen timer is running, the button Snooze/Timer 14. The kitchen timer is paused. The displayed remaining time begins to blink. NOTICE After approx. 15 seconds the device reverts back to the previous operational mode. Press the button Snooze/Timer 14 again to allow the remaining time of the kitchen timer to be shown once more. To restart the kitchen timer press the button Snooze/Timer 14 again. The kitchen timer restarts. To switch off the kitchen timer before the set time has expired press and hold down the Snooze/Timer 14 button for at least 2 seconds. 15
18 Handling and operation GB IE Programming the kitchen timer You can preprogramme the kitchen timer with the most frequently used times so that it is not necessary to continually reenter them. Up to 10 times can be preprogrammed. All 10 memory slots are preprogrammed with 10 minutes as standard. For the programming of the kitchen timer proceed as follows: Press the button Snooze/Timer 14 to activate the kitchen timer. Turn the VOLUME 14 knob to set the time to be programmed. Turning in a clockwise direction increases the time; turning in a counter clockwise direction reduces the time. Press the button Lock/Mem. 6 to activate the timer selection. Under the kitchen timer saucepan symbol a blinking is shown. Select with the buttons Preset+ 11 and Preset 10 a memory slot between and for the timer that is to be set. Press the button Lock/Mem. 6 again to programme the set time on the selected memory slot. The blinking under the saucepan symbol is now showing constantly. Repeat the process for the other memory slots. Accessing the kitchen timer To access a programmed time for the kitchen timer proceed as follows: Press the button Snooze/Timer 14 to activate the kitchen timer. Select with the buttons Preset+ 11 and Preset 10 the desired timer between and. Press the button Snooze/Timer 14 again to start the kitchen timer. 16
19 Handling and operation Programming alarm wake times The device has two alarms available. All settings for both alarms can be carried out independently from each other. You can select whether at the programmed time an alarm tone shall sound or the radio shall play. GB IE NOTICE If, during alarm wake programming, no button is pressed for approx. 15 seconds the alarm will activate with the current settings. Prerequisite: The device is in the operational mode clock/standby operation. To set the wake time proceed as follows: Press the Alarm1 button 8 or the Alarm2 button 9. The set wake time of the respective alarm is shown blinking in the display 3 and the indicator and/or appears. The weekday on which this alarm is to be activated is shown above the time indicator. Set with the buttons Tune+ 13 and Tune 12 the desired wake time. With each button press the wake time changes by one minute. Holding down the respective button for more than 2 seconds starts the speed setting. Press the button Dimmer/AOT 5 to switch between the weekday combinations Mo-Fr, Sa-Su or Mo-Su. The respective selected combination is shown above the wake time. Press and hold down the button Dimmer/AOT 5 for at least 2 seconds to switch between the weekday combinations and individual weekday setting alternatives. NOTICE With the individual weekday setting alternative you switch between the days of the week with the button Dimmer/AOT 5. Press the Alarm1 button 8 and/or the Alarm2 button 9 to save the set weekday combination and move to the setting of the alarm type (tone or radio). Wake with alarm tone Prerequisite: The device is in the operational mode clock/standby operation. To select "Alarm tone" for the respective alarm press the Alarm1 button 8 or the Alarm2 button 9 several times in succession until, in the display 3, the symbol appears. 17
20 Handling and operation GB IE Waken with radio If you want to be woken by the radio, before activating the wake time carry out the following settings: Switch the radio on by pressing the On/Off 4 button. Select the station with which you want to be woken (see section Station setting). With the VOLUME 14 knob set the desired volume (see section Volume settings). Switch the radio off by pressing the On/Off 4 button. To select "Radio" for the respective alarm press the Alarm1 button 8 or the Alarm2 button 9 several times in succession until, in the display 3, the symbol appears. Switching the alarm off Prerequisite: The device is in the operational mode clock/standby operation. To switch off the respective alarm press the Alarm1 button 8 or the Alarm2 button 9 several times in succession until no symbols are shown in the display 3. When the wake time has arrived With the setting "Wake with alarm tone" a fourfold signal tone sounds in intervals of 2 seconds. The volume of the signal tone will continually increase until the maximum volume has been reached. The duration of the wake signal is restricted to 10 minutes. With the setting "Wake with radio" the radio will switch on. The previously selected station will be activated for a maximum of 60 minutes at the set volume. Press the button Snooze/Timer 14 to activate a repeat wake after 9 minutes. NOTICE The repeat wake function is possible up to 60 minutes after the set wake time has arrived. Press the Alarm1 button 8 or the Alarm2 button 9 to end the current alarm. NOTICE The alarm becomes active again when the next wake time has arrived (i.e. on the next day). 18
21 Handling and operation The Reminder function The device will remind you of the date that you have set with the memory function. A signal tone sounds at the set time for 10 minutes every hour and it blinks in the display 3. Radio operation Press any button to end the signal tone. GB IE NOTICE For a good radio reception the wire antenna 15 must be completely uncoiled. Adjust the antenna, whilst in radio operation, to the best reception. The technical factors of the device allow for tuning reception frequencies outside of the permitted VHF (FM) range of MHz. In some countries, diff erent national regulations may apply to the assigned radio frequency ranges. Please note that information received outside of the assigned radio frequency ranges may not be exploited, passed on to third parties or otherwise misused. Switching the radio on/off Switch the radio on by pressing the On/Off 4 button.the display 3 shows the current reception frequency of the tuned station. Switch the radio off by pressing the On/Off 4 button again.the device changes back to the operational mode clock/standby operation. The current time of day is shown. Adjusting the volume. With the VOLUME 14 knob set the desired volume. Turning in a clockwise direction increases the volume; turning in a counter clockwise direction reduces the volume. The volume level is shown on the left border of the display 3. Manual station selection By a single press on the buttons Tune+ 13 and Tune 12 tune the desired station. The frequency of the station is shown in the display 3. During the tuning the speaker is switched off. 19
22 Handling and operation GB IE Search for the next station The device can automatically search for the nearest station. Press and hold down the button Tune+ 13 or Tune- 12 for at least two seconds. The device searches for the nearest station with suffi cient reception quality. Repeat this process until you have found the station you are looking for. Saving stations manually Prerequisite: The device is in the radio operational mode. The device has 30 memory slots available for station frequencies. To save a station frequency proceed as follows: Tune, as described previously, the desired station. Press the button Lock/Mem. 6 once. The symbol MEM begins to blink in the lower, right corner of the display 3. Select with the buttons Preset+ 11 and Preset 10 the desired memory slot for the tuned station between and. Press the button Lock/Mem. 6 again. The reception frequency of the tuned station is saved on the selected memory slot. The symbol MEM lights up constantly. Access saved stations Prerequisite: The device is in the radio operational mode. Select with the buttons Preset+ 11 and Preset 10 the desired memory slot for the saved station between and. Automatic station search (AMS function) Prerequisite: The device is in the radio operational mode. To allocate the memory slots to the station frequencies with the strongest receivable stations a station search can be carried out. NOTICE With the carrying out of the following described function all previously saved stations will be lost. Press and hold down the button Bass/AMS/Mode 7 for at least two seconds. The device begins the station search and allocates to the memory slots - the found stations. 20
23 Handling and operation NOTICE If more than 30 stations are found only the fi rst 30 reception frequencies will be saved. If less than 30 stations are found the last memory slots remain unchanged. GB IE Additional functions Automatic switch off (Sleep function) With the sleep function the radio switches itself off after a time lapse of between 5 and 120 minutes. To access the function press the button Dimmer/AOT 5. The current remaining time until the radio switches itself off is shown. Press the button Dimmer/AOT 5 repeatedly to set the desired time. Holding down the button for more than 2 seconds starts the speed setting. NOTICE The setable time frame lasts from 120 to 5 minutes. The setting takes place in stages of 5 minutes. After which the indicator appears. With the indicator the sleep function is switched off. Button lock You can lock the buttons of the device so that settings cannot be altered by unauthorised people or children. Press and hold down the button Lock/Mem. 6 for at least two seconds to switch the button lock on or off. When the button lock is switched on the symbol appears in the display 3. Bass accentuation With the bass accentuation you can switch on an enhanced playback of the low frequencies. Prerequisite: The device is in the radio operational mode. Press briefl y the button Bass/AMS/Mode 7 to switch the bass accentuation on or off. With the bass accentuation switched on the symbol BASS appears in the display 3. 21
24 Handling and operation/cleaning GB IE Setting the display brightness manually Press and hold down the Dimmer/AOT 5 button for at least 2 seconds. The current setting for the display brightness is shown ( = bright or = dim). Press and hold down the Dimmer/AOT 5 button again for at least 2 seconds to change the setting. NOTICE With the setting the display 3 lights up for approx. 15 seconds as soon as any button is pressed. With the setting the display 3 lights up permanently. Setting alternative display Cleaning Prerequisite: The device is in the radio operational mode. Press the Alarm1 button 8. The current time of day is shown. Now every 5 seconds the indication in the display 3 alternates between the reception frequency of the set radio station and the time of day. Press the Alarm1 button 8 again and the reception frequency of the set radio station will again be displayed permanently. Press the Alarm2 button 9. The current time of day is shown permanently. Press the Alarm2 button 9 again and the reception frequency of the set radio station will again be displayed permanently. Safety instructions DANGER Life-threatening situation from electric shock! Remove the plug from the mains power socket before cleaning. IMPORTANT Damaging of the device! Make sure when you are cleaning the device that no moisture gets inside in order to avoid irreparable damage to it. Cleaning the housing Clean the surfaces of the device with a soft, dry cloth. 22
25 Troubleshooting Troubleshooting In this section you receive important information for the localization and remedying of malfunctions. Observe the instructions in order to avoid danger and damage. GB IE Safety instructions WARNING Observe the following safety information to avoid danger and property damage: Repairs to electronic devices may only be carried out by specialists who have been trained by the manufacturer. Considerable danger to the consumer and damage to the device can occur as a result of incorrect repairs. Malfunction causes and remedies The following table will help with localizing and remedying minor malfunctions: Defect Possible cause Solution The display 3 is showing nothing. No sound Noisy radio reception The plug is not inserted. Mains power socket is not supplying power. The volume is set to minimum. The radio is switched off. The radio station is not properly tuned in. Reception is too weak. Insert the plug into the mains power socket. Check the circuit fuse. Increase the volume with the VOLUME 14 knob. Switch the radio on with the On/Off 4 button. Tune the station correctly with the buttons Tune+ 13 and Tune 12. Try to improve reception by moving the wire antenna 15. NOTICE If you cannot solve the problem with the aforementioned methods, please contact Customer Service. 23
26 Storage/Disposal GB IE Storage/Disposal Storage If you do not intend to use the device for an extended period of time, disconnect it from the mains power supply, remove the battery and store it at a clean, dry location that is not subjected to direct sunlight. Disposal of the device Do not dispose of the device in your normal domestic waste. This product is subject to the European directive 2002/96/EC-WEEE (Waste Electrical and Electronic Equipment). Dispose of the device through an approved disposal centre or at your community waste facility. Observe the currently applicable regulations. In case of doubt, please contact your waste disposal centre. Disposing of the batteries Batteries must not be disposed of in the household waste. Every consumer is legally obligated to hand in batteries at a collection centre in his/her community/district or a dealer. This obligation is intended to ensure that batteries are disposed of in an environmentally friendly manner. Hand batteries in only when they are fully discharged. 24
27 Appendix Appendix Information regarding the EG conformity declaration GB IE This device complies regarding conformance to the basic requirements and other relevant regulations of the European directive for electromagnetic compatibility 2004/108/EC, the low voltage directive 2006/95/EC as well as the Ecodesign directive 2009/125/EC (Supplement 1275/2008 Appendix II, Nr.1) The complete original declaration of conformity can be obtained from the importer. Technical data Operational voltage Battery for data retention Power consumption V / 50 Hz 1 x 3 V Type CR2032 (supplied) Operation approx. 5 W Standby approx W Speaker power output: approx. 800 mw (with 10 % harmonic distortion) Radio frequency range (VHF) MHz Operating temperature C Humidity (no condensation) 5-90 % Measurements (H x W x D): (without stand) approx. 5 x 21.9 x 12 cm Weight approx. 650 g Protection class II 25
28 Appendix GB IE Warranty With this device you receive a 3 year warranty from the date of purchase. The device has been manufactured with care and meticulously examined before delivery. Please retain your receipt as proof of purchase. In the case of a warranty claim, please get in touch, by telephone, with our service department. Only in this way can a post-free dispatch for your goods be assured. Service Importer NOTICE The warranty adjustment is valid only for material or manufacturing defects not, however, for transport damage, wear and tear or for damage to breakable parts, i.e. switches or rechargeable batteries. The device is intended solely for private, non-commercial use. If this product has been subjected to improper or inappropriate handling, abuse, or modifi cations not carried out by one of our authorised sales and service outlets, the warranty becomes void. Your statutory rights are not restricted in any way by this warranty. The warranty period will not be extended as a result of warranty adjustments. This applies also to replacement and repaired parts. Possible damage and/or faults present at the time of purchase must be reported immediately after unpacking or, at the very latest, within two days after the purchase date. After expiry of the warranty period incidental repairs are subject to payment. Service Great Britain Tel.: ( 0.10/Min.) kompernass@lidl.co.uk IAN Service Ireland Tel.: (0,08 EUR/Min., (peak)) (0,06 EUR/Min., (off peak)) kompernass@lidl.ie IAN KOMPERNASS GMBH BURGSTRASSE BOCHUM, GERMANY 26
29 Sisällysluettelo Johdanto Tätä käyttöohjetta koskevia tietoja.28 Tekijänoikeus Määräystenmukainen käyttö Varoitukset Turvallisuus Sähkövirran aiheuttama vaara Paristojen käsittely Perusturvaohjeita Käyttöelementit Sijoitus ja kytkennät Turvaohjeita Toimitussisältö ja kuljetuksen jälkeinen tarkastus Purkaminen pakkauksesta Pakkauksen hävittäminen Pystytyspaikalle asetetut vaatimukset. 34 Sähköliitäntä Pariston asettaminen laitteeseen...35 Kaappiin tai hyllyyn kiinnittäminen.35 Irrottaminen Laitteen pystytys Virransyötön kytkeminen ULA-lanka-antenni Käyttö Päälle- ja poiskytkeminen Perusasetukset Asetusvalikon aktivoiminen Kellonajan asettaminen Päivämäärän asettaminen Muistutustoiminnon asettaminen...38 Kellonaikaformaatin asettaminen..39 Näytön automaattisen himmennyksen asettaminen Näytön himmennyksen päälle- ja poiskytkentäajan asettaminen Keittiöajastin Keittiöajastimen asettaminen Keittiöajastimen käynnistäminen...41 Keittiöajastimen keskeyttäminen...41 Keittiöajastimen ohjelmoiminen...42 Keittiöajastimen avaaminen Herätysaikojen ohjelmointi Herätys merkkiäänellä Herätys radiolla Herätyksen kytkeminen pois päältä.44 Kun herätysaika on saavutettu Muistutustoiminto Radiokäyttö Radion päälle-/poiskytkeminen...45 Äänenvoimakkuuden säätäminen..45 Kanavien asettaminen manuaalisesti 45 Seuraavan kanavan etsintä Kanavan manuaalinen tallentaminen 46 Tallennetun kanavan valitseminen.46 Automaattinen kanavahaku (AMS-toiminto) Muita toimintoja Automaattinen poiskytkeminen (torkkutoiminto) Näppäinlukitus Bassovahvistin Näytön kirkkauden asettaminen manuaalisesti Vuorottelevan tekstin asettaminen näytölle Puhdistus Turvaohjeita Kotelon puhdistaminen Vianetsintä Turvaohjeita Vikojen syyt ja korjaaminen Säilytys/Hävittäminen Säilytys Laitteen hävittäminen Paristojen hävittäminen Liite EY-vaatimustenmukaisuusvakuutusta koskevia huomautuksia Tekniset tiedot Takuu Huolto Maahantuoja FI
30 Johdanto Johdanto FI Tätä käyttöohjetta koskevia tietoja Tämä käyttöohje on uppoasennettavan radion (seuraavassa laite) osa ja se sisältää määräysten mukaista käyttöä, turvallisuutta, liitäntää sekä laitteen käyttöä koskevia tärkeitä ohjeita. Käyttöohjeen on aina oltava laitteen lähellä helposti saatavilla. Jokaisen laitetta käyttävän tai häiriöitä korjaavan henkilön on luettava se ja noudatettava sen ohjeita. Säilytä käyttöohje ja luovuta sen laitteen mukana mahdolliselle seuraavalle omistajalle. Tekijänoikeus Tämä dokumentti on suojattu tekijänoikeudellisesti. Kaikenlainen monistaminen tai kopiointi, myös osittain, sekä kuvien toistaminen, myös muutettuna, on sallittua ainoastaan valmistajan kirjallisella luvalla. Määräystenmukainen käyttö Tämä laite on tarkoitettu ainoastaan ULA-radio-ohjelmien vastaanottoon, käytettäväksi keittiöajastimena tai hälyttämiseen hälytysäänellä tai radiolla suljetuissa tiloissa. Laite on tarkoitettu sijoitettavaksi vapaasti tai asennettavaksi kaapin tai hyllyn alapuolelle. Sijoituksessa tai asennuksessa on käytettävä toimintuksee sisältyvää tukijalkaa tai asennuslevyä. Muu tai laajempi käyttö katsotaan määräystenvastaiseksi. Laitetta ei saa käyttää kaupallisessa tai teollisessa toiminnassa. VAROITUS Määräystenvastaisen käytön aiheuttama vaara! Laite voi aiheuttaa vaaratilanteita, mikäli sitä käytetään määräystenvastaisesti ja/tai ohjeista poikkeavalla tavalla. Käytä laitetta ainoastaan määräystenmukaisesti. Noudata tässä käyttöohjeessa kuvattuja toimintatapoja. Emme vastaa mistään määräystenvastaisesta käytöstä, asiattomista korjauksista, luvattomasti suoritetuista muutoksista tai muiden kuin sallittujen varaosien käytöstä johtuvista vahingoista. Laitteen käyttäjä on yksinomaisessa vastuussa mahdollisista riskeistä. 28
31 Johdanto Varoitukset Seuraavassa käyttöohjeessa käytetään seuraavia varoituksia: VAARA Tämän vaara-asteen varoitus on merkkinä uhkaavasta vaarallisesta tilanteesta. Mikäli vaarallista tilannetta ei estetä, se voi aiheuttaa kuoleman tai vakavia loukkaantumisia. Tämän varoituksen ohjeita on noudatettava kuoleman tai vakavien loukkaantumisten estämiseksi. FI VAROITUS Tämän vaaratason varoitus varoittaa mahdollisesta vaarallisesta tilanteesta. Mikäli vaarallista tilannetta ei estetä, se voi aiheuttaa loukkaantumisia. Tämän varoituksen ohjeita on noudatettava henkilöiden loukkaantumisen estämiseksi. HUOMIO Tämän vaaratason varoitus varoittaa mahdollisesta esinevahingosta. Mikäli tilannetta ei estetä, se voi aiheuttaa esinevahinkoja. Noudata tämän varoituksen ohjeita esinevahinkojen välttämiseksi. OHJE Ohje sisältää lisätietoja, jotka helpottavat laitteen käsittelyä. 29
32 Johdanto FI Turvallisuus Tämä luku sisältää tärkeitä turvaohjeita, joita on noudatettava laitteen käsittelyssä. Tämä laite on voimassaolevien turvamääräysten mukainen. Asiaton käsittely voi aiheuttaa henkilö- ja esinevahinkoja. Sähkövirran aiheuttama vaara VAARA Sähkövirran aiheuttama hengenvaara! Jännitteen alaisia johtoja tai rakenneosia koskettaessa on olemassa hengenvaara! Noudata seuraavia turvaohjeita välttääksesi sähkövirran aiheuttamat vaarat: Älä käytä laitetta, jos verkkopistoke tai liitäntäjohto on vaurioitunut. Älä missään tapauksessa avaa laitteen koteloa. Jos jännitettä johtaviin liitäntöihin kosketaan ja sähköisiä ja mekaanisia rakenteita muutetaan, on olemassa sähköiskun vaara. Paristojen käsittely VAROITUS Asiattoman käytön aiheuttama vaara! Paristojen turvallinen käyttö edellyttää, että seuraavia turvaohjeita noudatetaan: Älä heitä paristoja tuleen. Räjähdysvaara! Älä oikosulje paristoja. Älä yritä ladata paristoja uudelleen. Tarkasta paristot säännöllisesti. Mikäli käsitellään vaurioituneita tai vuotavia paristoja, on noudatettava erityistä varovaisuutta. Syöpymisvaara! Käytä suojakäsineitä. Säilytä paristot lapsilta ulottumattomissa. Mikäli paristo on nielaistu, on otettava välittömästi yhteys lääkäriin. Poista paristot, jos et käytä laitetta pidemmän aikaa. 30
33 Johdanto Perusturvaohjeita Laitteen turvallisessa käsittelyssä on noudatettava seuraavia turvaohjeita: Tarkasta laite ennen käyttöä ulkoisten vaurioiden osalta. Älä ota viallista tai pudonnutta laitetta käyttöön. Mikäli kaapeli tai liitännät ovat vaurioituneet, ne on annettava valtuutetun ammattilaisen tai huoltopalvelun korjattavaksi. Tätä laitetta ei ole tarkoitettu sellaisten henkilöiden (mukaan lukien lapset) käyttöön, joiden fyysiset, sensoriset tai henkiset kyvyt ovat heikentyneet tai joilla on vähän kokemusta ja tietoa, lukuun ottamatta tilanteita, joissa heitä valvoo turvallisuudesta vastaava henkilö tai joissa he ovat saaneet tältä ohjeita laitteen käytöstä. On valvottava, etteivät lapset pääse leikkimään laitteella. Laitteen saavat korjata vain valtuutetut ammattiliikkeet tai huoltopalvelu. Asiattomat korjaukset voivat aiheuttaa vaaroja käyttäjälle. Lisäksi takuu raukeaa. Mikäli laitetta korjataan takuuajan voimassaoloaikana, korjaukset saa tehdä vain valmistajan valtuuttama huoltopalvelu. Takuu ei ole muutoin enää voimassa mahdollisten seuraavien vaurioiden osalta. Vialliset rakenneosat saa vaihtaa vain alkuperäisiin varaosiin. Vain silloin on varmistettu, että uudet osat täyttävät turvamääräykset. Suojaa laite kosteudelta ja sisään tunkeutuvilta nesteiltä. Älä koskaan upota laitetta veteen, aseta sitä veden läheisyyteen tai aseta nestettä sisältäviä esineitä (esim. maljakoita) sen päälle. Älä aseta laitteelle mitään esineitä. Älä käytä laitetta avotulen (esim. kynttilöiden) lähellä. Vältä suoraa auringonpaistetta. Vedä sähköjohto pistorasiasta aina pitäen kiinni liitäntäpistokkeesta, ei liitäntäjohdosta. Vedä verkkopistoke pistorasiasta, jos esiintyy häiriöitä tai ukkosta. FI 31
34 Käyttöelementit Käyttöelementit (Kuva, ks. avattavan sivun kuva A) FI Asennuslevy/tukijalka 2 Käyttökenttä 3 Näyttö 4 On/Off : Päälle-/poiskytkeminen (radio) 5 Dimmer/AOT: Näytön kirkkauden asettaminen/poiskytkentäajastin 6 Lock/Mem.: Näppäinlukitus/tallennuspaikan valinta 7 Bass/AMS/Mode: Bassovahvistin/kanavahaku/asetusvalikon avaaminen 8 Alarm 1: Hälytyksen 1 ohjelmoiminen/vuorottelevan tekstin asettaminen näytölle 9 Alarm 2: Hälytyksen 2 ohjelmoiminen/vuorottelevan tekstin asettaminen näytölle 10 Preset : Edellisen tallennuspaikan valinta 11 Preset+: Seuraavan tallennuspaikan valinta 12 Tune : Vastaanottotaajuuden pienentäminen 13 Tune+: Vastaanottotaajuuden korottaminen 14 VOLUME/Snooze/Timer: Äänenvoimakkuuden säätö/hälytyksen sammuttaminen/ ajastimen asettaminen 15 ULA-vastaanoton lanka-antenni 16 Verkkokaapeli 17 Tukijalan aukot 18 Kaiutin 19 Paristokotelo 20 Asennuslevyn irrotuspainikkeet 32
Under-Cabinet Radio SKRD 30 A1
 3 Under-Cabinet Radio Under-Cabinet Radio Operating instructions Uppoasennettava radio Käyttöohje Radio Bruksanvisning KOMPERNASS GMBH BURGSTRASSE 21 D-44867 BOCHUM www.kompernass.com ID-Nr.: -09/10-V3
1. SIT. The handler and dog stop with the dog sitting at heel. When the dog is sitting, the handler cues the dog to heel forward.
 START START SIT 1. SIT. The handler and dog stop with the dog sitting at heel. When the dog is sitting, the handler cues the dog to heel forward. This is a static exercise. SIT STAND 2. SIT STAND. The
PAINEILMALETKUKELA-AUTOMAATTI AUTOMATIC AIR HOSE REEL
 MAV4 MAV5 MAV6 PAINEILMALETKUKELA-AUTOMAATTI AUTOMATIC AIR HOSE REEL Käyttöohje Instruction manual HUOMIO! Lue käyttöohjeet huolellisesti ennen laitteen käyttöä ja noudata kaikkia annettuja ohjeita. Säilytä
National Building Code of Finland, Part D1, Building Water Supply and Sewerage Systems, Regulations and guidelines 2007
 National Building Code of Finland, Part D1, Building Water Supply and Sewerage Systems, Regulations and guidelines 2007 Chapter 2.4 Jukka Räisä 1 WATER PIPES PLACEMENT 2.4.1 Regulation Water pipe and its
INSTALLATION INSTRUCTION ASENNUSOHJE PEM SJTK31 SJTK46 ENGLISH SUOMI
 INSTALLATION INSTRUCTION ASENNUSOHJE PEM1256 2010-2 SJTK31 SJTK46 ENGLISH SUOMI GB GENERAL INFORMATION - Check that the kit is suitable for the cable type. - Check the materials listed in the bill of materials
LYTH-CONS CONSISTENCY TRANSMITTER
 LYTH-CONS CONSISTENCY TRANSMITTER LYTH-INSTRUMENT OY has generate new consistency transmitter with blade-system to meet high technical requirements in Pulp&Paper industries. Insurmountable advantages are
On instrument costs in decentralized macroeconomic decision making (Helsingin Kauppakorkeakoulun julkaisuja ; D-31)
") On instrument costs in decentralized macroeconomic decision making (Helsingin Kauppakorkeakoulun julkaisuja ; D-31) Juha Kahkonen Click here if your download doesn"t start automatically On instrument costs
On instrument costs in decentralized macroeconomic decision making (Helsingin Kauppakorkeakoulun julkaisuja ; D-31) Juha Kahkonen Click here if your download doesn"t start automatically On instrument costs
Recirkulering. El-tilslutning. Kontrolpanel. Dansk. Timerfunktion
 1 2 Dansk Recirkulering Luften renses ved hjælp at aktive kulfiltre hvorefter den returneres til rummet. Kulfiltre bestilles separat. El-tilslutning Emhætten skal tilsluttes 230 V i henhold til stærkstrømsreglementet.
Box 1. Things you have/ Pakkaus sisältää. x 4 x 16 x 4 x 4. 300mm. 1700mm. 300mm 1. Things you should know / Sinun Tulee Tietää
 Phobos 30 Things you should know / Sinun Tulee Tietää Things you prepare / Näitä Tarvitset DURING INSTALLATION ALL PRODUCTS: use protective gloves at all times use eye protection at all times never install
WINE COOLER TFW METOS TFW 160S, TFW 365-2S, TFW 375S MG ,
 WINE COOLER TFW METOS TFW 160S, TFW 365-2S, TFW 375S MG4116794, 4116798, 4116797 Instruction manual TWF 365-2S TWF 375S TWF 160S 01.09.2015 Table if Contents 1. Important safety instructions...3 2. Unpacking
Öljytäytteinen sähköpatteri Electric Oil Radiator
 Öljytäytteinen sähköpatteri Electric Oil Radiator KÄYTTÖOHJE Alkuperäisten ohjeiden käännös INSTRUCTIONS MANUAL Original instructions MALLI/MODEL: Holly 1500: ERC2-1507 Holly 2000: ERC2-2009 DT Istr (ERC
Solar Water Heater Kit. EcoStyle. 1 User Manual/Operating Instructions. Contents FREE LESSON PLANS AVAILABLE.
 EcoStyle 1 User Manual/Operating Instructions Contents 1 Contents 2 What s in the box? 3 Setting up the 4 Heating water 5 Measuring water temperature with the digital thermometer 6 Maximum/minimum temperature
Choose Finland-Helsinki Valitse Finland-Helsinki
 Write down the Temporary Application ID. If you do not manage to complete the form you can continue where you stopped with this ID no. Muista Temporary Application ID. Jos et onnistu täyttää lomake loppuun
Olet vastuussa osaamisestasi
 Olet vastuussa osaamisestasi Ohjelmistoammattilaisuuden uudet haasteet Timo Vehmaro 02-12-2015 1 Nokia 2015 Mitä osaamista tulevaisuudessa tarvitaan? Vahva perusosaaminen on kaiken perusta Implementaatio
Installation instruction PEM
 Installation instruction ASENNUSOHJE PEM1032 2010-02 SURGE ARRESTER SET FOR POLE MOUNT TRANSFORMER YLIJÄNNITESUOJASETTI PYLVÄSMUUNTAJALLE ENGLISH SUOMI 2/8 PEM1032 2010-02 ENGLISH GENERAL INFORMATION -
Curriculum. Gym card
 A new school year Curriculum Fast Track Final Grading Gym card TET A new school year Work Ethic Detention Own work Organisation and independence Wilma TMU Support Services Well-Being CURRICULUM FAST TRACK
4x4cup Rastikuvien tulkinta
 4x4cup Rastikuvien tulkinta 4x4cup Control point picture guidelines Päivitetty kauden 2010 sääntöihin Updated for 2010 rules Säännöt rastikuvista Kilpailijoiden tulee kiinnittää erityistä huomiota siihen,
Capacity Utilization
 Capacity Utilization Tim Schöneberg 28th November Agenda Introduction Fixed and variable input ressources Technical capacity utilization Price based capacity utilization measure Long run and short run
1/4. Resetointi ja vianmääritys. 22.11.2013 ntr
 A400-64176 Sähköpöydät 1/4 Resetointi ja vianmääritys Pöydän resetointi tehdään aina ennen käyttöönottoa ja tarvittaessa häiriötilanteessa. Määritä pöydän tyyppi käyttökytkimen ja jalustan mukaan ja tee
Presenter SNP6000. Register your product and get support at Käyttöopas
 Register your product and get support at www.philips.com/welcome Presenter SNP6000 FI Käyttöopas 1 a b c d e 2 3 4 Federal Communication Commission Interference Statement This equipment has been tested
Rekisteröiminen - FAQ
 Rekisteröiminen - FAQ Miten Akun/laturin rekisteröiminen tehdään Akun/laturin rekisteröiminen tapahtuu samalla tavalla kuin nykyinen takuurekisteröityminen koneille. Nykyistä tietokantaa on muokattu niin,
KONEISTUSKOKOONPANON TEKEMINEN NX10-YMPÄRISTÖSSÄ
 KONEISTUSKOKOONPANON TEKEMINEN NX10-YMPÄRISTÖSSÄ https://community.plm.automation.siemens.com/t5/tech-tips- Knowledge-Base-NX/How-to-simulate-any-G-code-file-in-NX- CAM/ta-p/3340 Koneistusympäristön määrittely
Uusi Ajatus Löytyy Luonnosta 4 (käsikirja) (Finnish Edition)
 (Finnish Edition)") Uusi Ajatus Löytyy Luonnosta 4 (käsikirja) (Finnish Edition) Esko Jalkanen Click here if your download doesn"t start automatically Uusi Ajatus Löytyy Luonnosta 4 (käsikirja) (Finnish Edition) Esko Jalkanen
Uusi Ajatus Löytyy Luonnosta 4 (käsikirja) (Finnish Edition) Esko Jalkanen Click here if your download doesn"t start automatically Uusi Ajatus Löytyy Luonnosta 4 (käsikirja) (Finnish Edition) Esko Jalkanen
MP3/CD CAR RADIO. Operating instructions. Käyttöohje. Bruksanvisning MP3/CD CAR RADIO MP3- JA CD-SOITTIMELLA VARUSTETTU AUTORADIO MP3-CD-BILRADIO
 3A MP3/CD CAR RADIO Operating instructions Käyttöohje Bruksanvisning GB FI SE MP3/CD CAR RADIO MP3- JA CD-SOITTIMELLA VARUSTETTU AUTORADIO MP3-CD-BILRADIO KOMPERNASS GMBH BURGSTRASSE 21 D-44867 BOCHUM
On instrument costs in decentralized macroeconomic decision making (Helsingin Kauppakorkeakoulun julkaisuja ; D-31)
") On instrument costs in decentralized macroeconomic decision making (Helsingin Kauppakorkeakoulun julkaisuja ; D-31) Juha Kahkonen Click here if your download doesn"t start automatically On instrument costs
On instrument costs in decentralized macroeconomic decision making (Helsingin Kauppakorkeakoulun julkaisuja ; D-31) Juha Kahkonen Click here if your download doesn"t start automatically On instrument costs
Owner s Manual GREE Electric Appliances,Inc.of zhuhai
 Ilmalämpöpumppu Split air conditioner wall mounted model Käyttäjän opas Owner s Manual GREE Electric Appliances,Inc.of zhuhai Ultra-thin GWHD09A3NK3DF KFR-25GW/NaA12FA GWHD12B2NK3AD KFR-32GW/NaA12FA Please
On instrument costs in decentralized macroeconomic decision making (Helsingin Kauppakorkeakoulun julkaisuja ; D-31)
") On instrument costs in decentralized macroeconomic decision making (Helsingin Kauppakorkeakoulun julkaisuja ; D-31) Juha Kahkonen Click here if your download doesn"t start automatically On instrument costs
On instrument costs in decentralized macroeconomic decision making (Helsingin Kauppakorkeakoulun julkaisuja ; D-31) Juha Kahkonen Click here if your download doesn"t start automatically On instrument costs
Tork Paperipyyhe. etu. tuotteen ominaisuudet. kuvaus. Väri: Valkoinen Malli: Vetopyyhe
 etu Monikäyttöpaperi hoitaa useimmat pyyhintätehtävät Sopiva lasipintojen pyyhintään Sopii käsien kuivaamiseen Elintarvikekäyttöön hyväksytty Tork Easy Handling, pakkaus, jota on helppo kantaa mukana,
Information on preparing Presentation
 Information on preparing Presentation Seminar on big data management Lecturer: Spring 2017 20.1.2017 1 Agenda Hints and tips on giving a good presentation Watch two videos and discussion 22.1.2017 2 Goals
Käyttöohje CRL Ennen tämän tuotteen käyttöä lue tämä käyttöohje huolellisesti ja kokonaan.
 Käyttöohje Kelloradio CRL-330 www.denver-electronics.com Ennen tämän tuotteen käyttöä lue tämä käyttöohje huolellisesti ja kokonaan. Tuotetiedot EN FI Correctly set the stand in specially design for it
Salasanan vaihto uuteen / How to change password
 Salasanan vaihto uuteen / How to change password Sisällys Salasanakäytäntö / Password policy... 2 Salasanan vaihto verkkosivulla / Change password on website... 3 Salasanan vaihto matkapuhelimella / Change
Spa Bath Mat SLB 450 A2
 PERSONAL CARE Spa Bath Mat Spa Bath Mat Operating instructions Bubbelbad Bruksanvisning Porekylpymatto Käyttöohje Luft-boblebad Betjeningsvejledning KOMPERNASS GMBH BURGSTRASSE 21 D-44867 BOCHUM www.kompernass.com
CONVERSION KITS FOR FRAMES MR8 AND MR9 INSTALLATION INSTRUCTIONS
 CONVERSION KITS FOR FRAMES MR8 AND MR9 INSTALLATION INSTRUCTIONS MR8 AND MR9 CONVERSION KIT - INSTALLATION INSTRUCTION Document ID: DPD01787, Revision: A, Release date: 17.11.2015 1.1 MR8 kit contents
INSTALLATION INSTRUCTION ASENNUSOHJE PEM1417 2012-11 ENGLISH SUOMI CURRENT LIMITING DEVICE VIRTAA RAJOITTAVA SUOJA SDI46.812 & SDI46.
 INSTALLATION INSTRUCTION ASENNUSOHJE PEM1417 2012-11 ENGLISH SUOMI CURRENT LIMITING DEVICE VIRTAA RAJOITTAVA SUOJA SDI46.812 & SDI46.824 2/8 SDI46.812 & SDI46.824 PEM1417 2012-11 ENGLISH GENERAL INFORMATION
Network to Get Work. Tehtäviä opiskelijoille Assignments for students. www.laurea.fi
 Network to Get Work Tehtäviä opiskelijoille Assignments for students www.laurea.fi Ohje henkilöstölle Instructions for Staff Seuraavassa on esitetty joukko tehtäviä, joista voit valita opiskelijaryhmällesi
10-in-1 Remote Control
 3 A 10-in-1 Remote Control KH 2158 10-in-1 Remote Control Operating manual Yleiskaukosäädin Käyttöohje KOMPERNASS GMBH BURGSTRASSE 21 D-44867 BOCHUM www.kompernass.com ID-Nr.: KH2158-04/10-V3 Universalfjärrkontroll
Undercupboard Radio SKRP 1000 A1
 Undercupboard Radio SKRP 1000 A1 Undercupboard Radio Operating manual Uppoasennettava radio Käyttöohje Radio Bruksanvisning Radio til underbygning Betjeningsvejledning Unterbau-Radio Bedienungsanleitung
Universal Remote Control
 3 A Universal Remote Control KH 2157 Universal Remote Control Operating manual Yleiskaukosäädin Käyttöohje KOMPERNASS GMBH BURGSTRASSE 21 D-44867 BOCHUM www.kompernass.com ID-Nr.: KH2157-09/09-V2 08/2009
Installation instruction PEM
 Installation instruction ASENNUSOHJE PEM1031 2010-04 CURRENT LIMITING DEVICE FOR POLE MOUNT TRANSFORMER VIRTAA RAJOITTAVA SUOJA PYLVÄSMUUNTAJALLE ENGLISH SUOMI 75 2/8 PEM1031 2010-04 ENGLISH GENERAL INFORMATION
Jokaisella person. käyttökerralla tehtävän rutiinitarkastuksen lisäksi pätevän henkilön tulisi tehdä henkilösuojaimelle
 Inspection Henkilösuojaimen tarkastus Tarkastusohjeet Inspection Inspection Inspection In addition to routine checks for each use, should regularly undergo a detailed inspection by a competent Jokaisella
Miksi Suomi on Suomi (Finnish Edition)
") Miksi Suomi on Suomi (Finnish Edition) Tommi Uschanov Click here if your download doesn"t start automatically Miksi Suomi on Suomi (Finnish Edition) Tommi Uschanov Miksi Suomi on Suomi (Finnish Edition)
Miksi Suomi on Suomi (Finnish Edition) Tommi Uschanov Click here if your download doesn"t start automatically Miksi Suomi on Suomi (Finnish Edition) Tommi Uschanov Miksi Suomi on Suomi (Finnish Edition)
SAGA 150. Asennusohjeet. Mittaa oven korkeus. Piirrä seinään oven kiinni -päätyyn seinäkannattimen kohdalle vaakaviiva korkeudelle ovi + 75mm + 20 mm.
 SAGA 150 Asennusohjeet 500 1 2 Mittaa oven korkeus. Piirrä seinään oven kiinni -päätyyn seinäkannattimen kohdalle vaakaviiva korkeudelle ovi + 75mm + 20 mm. 3 Piirrä vesivaa an avulla viiva myös kiskon
Bluetooth Car Radio SAB 160 A1
 3 Bluetooth Car Radio Bluetooth Car Radio Operating instructions Bluetooth-autoradio Käyttöohje KOMPERNASS GMBH BURGSTRASSE 21 D-44867 BOCHUM www.kompernass.com ID-Nr.: SAB160A1-05/11-V3 IAN: 66837 Bluetooth-bilradio
Särmäystyökalut kuvasto Press brake tools catalogue
 Finnish sheet metal machinery know-how since 1978 Särmäystyökalut kuvasto Press brake tools catalogue www.aliko.fi ALIKO bending chart Required capacity in kn (T) in relation to V-opening. V R A S = plates
PSSA-8/PSSA-8UK OWNERS MANUAL
 PSSA-8/PSSA-8UK OWNERS MANUAL LED indicator Test Button Art. 36.3066 / Art. 8.40 GB Power Switch (PSSA-8 / PSSA-8UK) Identifying the parts LED indicator Test Button Getting Started Plug the Power Switch
C++11 seminaari, kevät Johannes Koskinen
 C++11 seminaari, kevät 2012 Johannes Koskinen Sisältö Mikä onkaan ongelma? Standardidraftin luku 29: Atomiset tyypit Muistimalli Rinnakkaisuus On multicore systems, when a thread writes a value to memory,
Fitting instructions. Fitting set for joining all types of DEVI self limiting heating cables to heating cables Art. no. 19805779 SSTL nro 04 312 85
 GB/FI Fitting instructions Fitting set for joining all types of DEVI self limiting heating cables to heating cables Art. no. 19805779 SSTL nro 04 312 85 intelligent varme Contents: GB Connection kits 3
FI GB. Asennus-, käyttöohjeet. Installation, operation instructions
 FI GB Asennus-, käyttöohjeet Installation, operation instructions Asennus FI Keinuripustuksen asennus Tekstin sulkeissa olevat numerot viittaavat kuvien 1, 2, 3 ja 4 numerointiin. Kiinnitä keinuripustuksen
Golfpallon etsijä asennusmanuaali
 Golfpallon etsijä asennusmanuaali Prazza takuu Kaikki Prazza tuotteet on suunniteltu ja valmistettu tiukkojen laatuvaatimusten mukaan, tuotteet ovat helppokäyttöisiä ja helppoja asentaa. Jos sinulla ilmenee
Käyttöohje. USB Charger UCH20
 Käyttöohje USB Charger UCH20 Sisältö Johdanto... 3 USB Charger: Tietoja... 3 USB-laturin käyttäminen... 4 Laitteen akun lataaminen...4 Juridiset tiedot...5 Declaration of Conformity...6 2 Johdanto USB
IEC IP V AC. VIZULO Stork Little Brother LED street luminaire / katuvalaisin. Mounting instruction Asennusohjeet. min 40 C.
 VIZULO Stork Little Brother LED street luminaire / katuvalaisin Mounting instruction Asennusohjeet 05 IEC EN 60598 IP66 min 40 C max + 45 C 198-264 V AC PH2 4 6 29/01/2016 SIA VIZULO Ganibu dambis 7a,
2017/S Contract notice. Supplies
 Supplies 153936 2017 25/04/2017 S80 - - Supplies - Contract notice - Open procedure I. II. III. IV. VI. -: Medical equipments, pharmaceuticals and personal care products 2017/S 080-153936 Contract notice
Efficiency change over time
 Efficiency change over time Heikki Tikanmäki Optimointiopin seminaari 14.11.2007 Contents Introduction (11.1) Window analysis (11.2) Example, application, analysis Malmquist index (11.3) Dealing with panel
anna minun kertoa let me tell you
 anna minun kertoa let me tell you anna minun kertoa I OSA 1. Anna minun kertoa sinulle mitä oli. Tiedän että osaan. Kykenen siihen. Teen nyt niin. Minulla on oikeus. Sanani voivat olla puutteellisia mutta
TW-WLAN 802.11g/n MIMO PCI-sovitin Asennusohje
 TW-WLAN 802.11g/n MIMO PCI-sovitin Asennusohje CE Copyright Telewell Oy Esittely TW-WLAN PCI-sovitin on ulkoinen Wlan-sovitin PCIväylään. Ominaisuudet Yhteensopiva sekä IEEE 802.11b, 802.11g, että 802.11n
VAROITUKSET. Älä pura laitetta osiin.
 VAROITUKSET Laitteen väärinkäyttö voi johtaa henkilövahinkoihin. Noudata kaikkia tässä ohjekirjassa annettuja ohjeita ja käytä laitetta oikein. Älä koskaan seiso laitteen alapuolella. Älä pura laitetta
Sisällysluettelo Table of contents
 Sisällysluettelo Table of contents OTC:n Moodlen käyttöohje suomeksi... 1 Kirjautuminen Moodleen... 2 Ensimmäinen kirjautuminen Moodleen... 2 Salasanan vaihto... 2 Oma käyttäjäprofiili... 3 Työskentely
LUONNOS RT 80260 EN AGREEMENT ON BUILDING WORKS 1 THE PARTIES. May 1998 1 (10)
") RT 80260 EN May 1998 1 (10) AGREEMENT ON BUILDING WORKS This agreement template is based on the General Terms and Conditions of Building Contracts YSE 1998 RT 16-10660, LVI 03-10277, Ratu 417-7, KH X4-00241.
RT 80260 EN May 1998 1 (10) AGREEMENT ON BUILDING WORKS This agreement template is based on the General Terms and Conditions of Building Contracts YSE 1998 RT 16-10660, LVI 03-10277, Ratu 417-7, KH X4-00241.
The Viking Battle - Part Version: Finnish
 The Viking Battle - Part 1 015 Version: Finnish Tehtävä 1 Olkoon kokonaisluku, ja olkoon A n joukko A n = { n k k Z, 0 k < n}. Selvitä suurin kokonaisluku M n, jota ei voi kirjoittaa yhden tai useamman
Bounds on non-surjective cellular automata
 Bounds on non-surjective cellular automata Jarkko Kari Pascal Vanier Thomas Zeume University of Turku LIF Marseille Universität Hannover 27 august 2009 J. Kari, P. Vanier, T. Zeume (UTU) Bounds on non-surjective
TW-LTE 4G/3G. USB-modeemi (USB 2.0)
") TW-LTE 4G/3G USB-modeemi (USB 2.0) Tiedonsiirtonopeus: 100 Mbps/50 Mbps LTE: 1800/2100/2600 MHz GSM/GPRS/EDGE: 850/900/1800/1900 MHz UMTS: 900/2100 MHz Pikaohje (Finnish) CE Käyttöönotto- ohje SIM- kortin
TW-LTE 4G/3G USB-modeemi (USB 2.0) Tiedonsiirtonopeus: 100 Mbps/50 Mbps LTE: 1800/2100/2600 MHz GSM/GPRS/EDGE: 850/900/1800/1900 MHz UMTS: 900/2100 MHz Pikaohje (Finnish) CE Käyttöönotto- ohje SIM- kortin
INSTALLATION INSTRUCTION ASENNUSOHJE PEM ENGLISH SUOMI INSULATION PIERCING CONNECTOR SLIW17.2 ERISTYKSEN LÄPÄISEVÄ LIITIN SLIW17.
 INSTALLATION INSTRUCTION ASENNUSOHJE PEM904 2011-08 ENGLISH SUOMI INSULATION PIERCING CONNECTOR SLIW17.2 ERISTYKSEN LÄPÄISEVÄ LIITIN SLIW17.2 2/8 SLIW17.2 PEM904 2011-08 GENERAL INFORMATION (ENG) - Check
Data protection template
 Data protection template Aihe: rekisteriseloste ja informointipohja Topic: information about the register and information to users (related to General Data Protection Regulation (GDPR) (EU) 2016/679) Mallina
Tilausvahvistus. Anttolan Urheilijat HENNA-RIIKKA HAIKONEN KUMMANNIEMENTIE 5 B RAHULA. Anttolan Urheilijat
 7.80.4 Asiakasnumero: 3000359 KALLE MANNINEN KOVASTENLUODONTIE 46 51600 HAUKIVUORI Toimitusosoite: KUMMANNIEMENTIE 5 B 51720 RAHULA Viitteenne: Henna-Riikka Haikonen Viitteemme: Pyry Niemi +358400874498
You can check above like this: Start->Control Panel->Programs->find if Microsoft Lync or Microsoft Lync Attendeed is listed
 Online Meeting Guest Online Meeting for Guest Participant Lync Attendee Installation Online kokous vierailevalle osallistujalle Lync Attendee Asennus www.ruukki.com Overview Before you can join to Ruukki
FinFamily PostgreSQL installation ( ) FinFamily PostgreSQL
 FinFamily PostgreSQL") FinFamily PostgreSQL 1 Sisällys / Contents FinFamily PostgreSQL... 1 1. Asenna PostgreSQL tietokanta / Install PostgreSQL database... 3 1.1. PostgreSQL tietokannasta / About the PostgreSQL database...
FinFamily PostgreSQL 1 Sisällys / Contents FinFamily PostgreSQL... 1 1. Asenna PostgreSQL tietokanta / Install PostgreSQL database... 3 1.1. PostgreSQL tietokannasta / About the PostgreSQL database...
Returns to Scale II. S ysteemianalyysin. Laboratorio. Esitelmä 8 Timo Salminen. Teknillinen korkeakoulu
 Returns to Scale II Contents Most Productive Scale Size Further Considerations Relaxation of the Convexity Condition Useful Reminder Theorem 5.5 A DMU found to be efficient with a CCR model will also be
Tarua vai totta: sähkön vähittäismarkkina ei toimi? 11.2.2015 Satu Viljainen Professori, sähkömarkkinat
 Tarua vai totta: sähkön vähittäismarkkina ei toimi? 11.2.2015 Satu Viljainen Professori, sähkömarkkinat Esityksen sisältö: 1. EU:n energiapolitiikka on se, joka ei toimi 2. Mihin perustuu väite, etteivät
RQT0B24-1E. Model No. SC-UA7
 Operating Instructions Bruksanvisning Betjeningsvejledning Käyttöohjeet Instrucciones de funcionamiento Wireless Speaker System Trådlöst högtalarsystem Trådløst højttalersystem Langaton kaiutinjärjestelmä
Introduction Proper Use...Page 7 Supply Scope...Page 8 Description of Parts...Page 8 Technical Data...Page 9
 Table of Contents Introduction Proper Use...Page 7 Supply Scope...Page 8 Description of Parts...Page 8 Technical Data...Page 9 Safety Instructions...Page 10 Before you start...page 15 Set the time...page
TÄYTTÖAUTOMAATIT TÄYTTÖAUTOMAATIT COMPUTER INFLATORS
 31 S AHCON computer inflators are designed with a view to high quality, precision and long service life. The inflation computers are designed in Denmark and manufactured and tested in our own workshop.
Secto Design Oy Kauppalantie 12 02700 Kauniainen Finland tel. +358 9 5050598 fax +358 9 5475 2535 info@sectodesign.fi www.sectodesign.
 Secto Design Oy Kauppalantie 12 02700 Kauniainen Finland tel. +358 9 5050598 fax +358 9 5475 2535 info@sectodesign.fi www.sectodesign.fi Secto 4200 pendant natural birch, black or white laminate, walnut
Vakiomallisten kuumakanavajärjestelmien kytkeminen Wiring of standard hotrunner systems
 Teknillinen dokumentaatio Technical documentation E. Vakiomallisten kuumakanavajärjestelmien kytkeminen Wiring of standard hotrunner systems Version.0 ! Tärkeä turvaohje / Important safety instruction
OFFICE 365 OPISKELIJOILLE
 OFFICE 365 OPISKELIJOILLE Table of Contents Articles... 3 Ohjeet Office 365 käyttöönottoon... 4 One Driveen tallennetun videon palauttaminen oppimisympäristön palautuskansioon... 5 Changing default language
Ajettavat luokat: SM: S1 (25 aika-ajon nopeinta)
") SUPERMOTO SM 2013 OULU Lisämääräys ja ohje Oulun Moottorikerho ry ja Oulun Formula K-125ry toivottaa SuperMoto kuljettajat osallistumaan SuperMoto SM 2013 Oulu osakilpailuun. Kilpailu ajetaan karting radalla
SUPERMOTO SM 2013 OULU Lisämääräys ja ohje Oulun Moottorikerho ry ja Oulun Formula K-125ry toivottaa SuperMoto kuljettajat osallistumaan SuperMoto SM 2013 Oulu osakilpailuun. Kilpailu ajetaan karting radalla
BYAS START-UP -PAKETIT JA ASPT?BYAS?
 BYAS START-UP -PAKETIT JA ASPT?BYAS? EN WEST FI CASH PARTNEREILLE VOIMASSA 16.06.2017 ALKAEN SUP-PAKETTI FACE SILVER SUP-PAKETTI FACE SILVER SUP-PAKETTI FACE SILVER PLUS* SIS. ASP, 6 KUUKAUTTA Normaalihinta
LOUDSPEAKER SYSTEM. Operating instructions. Käyttöohje. Bruksanvisning. Betjeningsvejledning
 3 LOUDSPEAKER SYSTEM Operating instructions Käyttöohje Bruksanvisning Betjeningsvejledning GB FI SE DK Loudspeaker System Langaton kaiutinjärjestelmä Radiohögtalarsystem Radiostyret højtalersystem KH 2525
Results on the new polydrug use questions in the Finnish TDI data
 Results on the new polydrug use questions in the Finnish TDI data Multi-drug use, polydrug use and problematic polydrug use Martta Forsell, Finnish Focal Point 28/09/2015 Martta Forsell 1 28/09/2015 Esityksen
AYYE 9/ HOUSING POLICY
 AYYE 9/12 2.10.2012 HOUSING POLICY Mission for AYY Housing? What do we want to achieve by renting apartments? 1) How many apartments do we need? 2) What kind of apartments do we need? 3) To whom do we
Sisävesidirektiivin soveltamisala poikkeussäännökset. Versio: puheenjohtajan ehdotus , neuvoston asiakirja 8780/16.
 Sisävesidirektiivin soveltamisala poikkeussäännökset Versio: puheenjohtajan ehdotus 13.5.2016, neuvoston asiakirja 8780/16. Artikla 2 1. This Directive applies to deck crew members, radio operators, liquefied
Nuku hyvin, pieni susi -????????????,?????????????????. Kaksikielinen satukirja (suomi - venäjä) (www.childrens-books-bilingual.com) (Finnish Edition)
 (www.childrens-books-bilingual.com) (Finnish Edition)") Nuku hyvin, pieni susi -????????????,?????????????????. Kaksikielinen satukirja (suomi - venäjä) (www.childrens-books-bilingual.com) (Finnish Edition) Click here if your download doesn"t start automatically
Nuku hyvin, pieni susi -????????????,?????????????????. Kaksikielinen satukirja (suomi - venäjä) (www.childrens-books-bilingual.com) (Finnish Edition) Click here if your download doesn"t start automatically
Lab SBS3.FARM_Hyper-V - Navigating a SharePoint site
 Lab SBS3.FARM_Hyper-V - Navigating a SharePoint site Note! Before starting download and install a fresh version of OfficeProfessionalPlus_x64_en-us. The instructions are in the beginning of the exercise.
Supplies
 Supplies - 239150-2018 05/06/2018 S105 - - Supplies - Contract notice - Open procedure I. II. III. IV. VI. Finland-Oulu: Medical equipments 2018/S 105-239150 Contract notice Supplies Directive 2014/24/EU
Reliable diagnostic support Ultra-light design
 EN Powerful illumination Intelligent charging management Reliable diagnostic support Ultra-light design VISIOMED Optima UV original scale 1:1 VISIOMED Optima Quality Made Easy and an illumination close
Tietorakenteet ja algoritmit
 Tietorakenteet ja algoritmit Taulukon edut Taulukon haitat Taulukon haittojen välttäminen Dynaamisesti linkattu lista Linkatun listan solmun määrittelytavat Lineaarisen listan toteutus dynaamisesti linkattuna
Information on Finnish Courses Autumn Semester 2017 Jenni Laine & Päivi Paukku Centre for Language and Communication Studies
 Information on Finnish Courses Autumn Semester 2017 Jenni Laine & Päivi Paukku 24.8.2017 Centre for Language and Communication Studies Puhutko suomea? -Hei! -Hei hei! -Moi! -Moi moi! -Terve! -Terve terve!
Exercise 1. (session: )
") EEN-E3001, FUNDAMENTALS IN INDUSTRIAL ENERGY ENGINEERING Exercise 1 (session: 24.1.2017) Problem 3 will be graded. The deadline for the return is on 31.1. at 12:00 am (before the exercise session). You
EEN-E3001, FUNDAMENTALS IN INDUSTRIAL ENERGY ENGINEERING Exercise 1 (session: 24.1.2017) Problem 3 will be graded. The deadline for the return is on 31.1. at 12:00 am (before the exercise session). You
1/6. Resetointi ja vianmääritys lju
 400-64176_ Sähköpöydät 1/6 esetointi ja vianmääritys Pöydän resetointi tehdään aina ennen käyttöönottoa ja tarvittaessa häiriötilanteessa. Määritä pöydän tyyppi käyttökytkimen ja jalustan mukaan ja tee
TIEKE Verkottaja Service Tools for electronic data interchange utilizers. Heikki Laaksamo
 TIEKE Verkottaja Service Tools for electronic data interchange utilizers Heikki Laaksamo TIEKE Finnish Information Society Development Centre (TIEKE Tietoyhteiskunnan kehittämiskeskus ry) TIEKE is a neutral,
The CCR Model and Production Correspondence
 The CCR Model and Production Correspondence Tim Schöneberg The 19th of September Agenda Introduction Definitions Production Possiblity Set CCR Model and the Dual Problem Input excesses and output shortfalls
LX 70. Ominaisuuksien mittaustulokset 1-kerroksinen 2-kerroksinen. Fyysiset ominaisuudet, nimellisarvot. Kalvon ominaisuudet
 LX 70 % Läpäisy 36 32 % Absorptio 30 40 % Heijastus 34 28 % Läpäisy 72 65 % Heijastus ulkopuoli 9 16 % Heijastus sisäpuoli 9 13 Emissiivisyys.77.77 Auringonsuojakerroin.54.58 Auringonsäteilyn lämmönsiirtokerroin.47.50
Security server v6 installation requirements
 CSC Security server v6 installation requirements Security server version 6.4-0-201505291153 Pekka Muhonen 8/12/2015 Date Version Description 18.12.2014 0.1 Initial version 10.02.2015 0.2 Major changes
Asennusopas. DEVIreg 531. Elektroninen termostaatti.
 Asennusopas DEVIreg 531 Elektroninen termostaatti www.devi.com Sisällysluettelo 1 Johdanto................. 3 1.1 Tekniset tiedot.......... 4 1.2 Turvaohjeet............ 5 2 Asennusohjeet.............
Microsoft Lync 2010 Attendee
 VYVI MEETING Lync Attendee 2010 Instruction 1 (15) Microsoft Lync 2010 Attendee Online meeting VYVI MEETING Lync Attendee 2010 Instruction 2 (15) Index 1 Microsoft LYNC 2010 Attendee... 3 2 Acquiring Lync
Gap-filling methods for CH 4 data
 Gap-filling methods for CH 4 data Sigrid Dengel University of Helsinki Outline - Ecosystems known for CH 4 emissions; - Why is gap-filling of CH 4 data not as easy and straight forward as CO 2 ; - Gap-filling
Information on Finnish Language Courses Spring Semester 2018 Päivi Paukku & Jenni Laine Centre for Language and Communication Studies
 Information on Finnish Language Courses Spring Semester 2018 Päivi Paukku & Jenni Laine 4.1.2018 Centre for Language and Communication Studies Puhutko suomea? -Hei! -Hei hei! -Moi! -Moi moi! -Terve! -Terve
Calisto USB-kaiutinpuhelin. Käyttöopas
 Calisto 7200 USB-kaiutinpuhelin Käyttöopas Sisällysluettelo Yleiskatsaus 3 Connect to PC 4 Päivittäinen käyttö 5 Power 5 Äänenvoimakkuus 5 Mykistys / mykistyksen poisto 5 Puheluun vastaaminen tai puhelun
Security server v6 installation requirements
 CSC Security server v6 installation requirements Security server version 6.x. Version 0.2 Pekka Muhonen 2/10/2015 Date Version Description 18.12.2014 0.1 Initial version 10.02.2015 0.2 Major changes Contents
S Sähkön jakelu ja markkinat S Electricity Distribution and Markets
 S-18.3153 Sähkön jakelu ja markkinat S-18.3154 Electricity Distribution and Markets Voltage Sag 1) Kolmivaiheinen vastukseton oikosulku tapahtuu 20 kv lähdöllä etäisyydellä 1 km, 3 km, 5 km, 8 km, 10 km
16. Allocation Models
 16. Allocation Models Juha Saloheimo 17.1.27 S steemianalsin Optimointiopin seminaari - Sks 27 Content Introduction Overall Efficienc with common prices and costs Cost Efficienc S steemianalsin Revenue